

CGM placement guide: Where to wear your sensor for accurate readings

You can follow every instruction and still feel unsure about your numbers. Sometimes the issue is not your insulin, your food, or your settings. It is your CGM placement.
CGM placement influences accuracy, compression lows, comfort, and how well your cgm adhesive patch holds through sleep, work, and exercise. If your libre patch keeps lifting or your dexcom overpatch peels early, your CGM placement may need adjusting.
This guide explains where to wear your sensor, how to rotate sites safely, and how to support CGM placement so your readings feel steady and reliable.
Why CGM Placement Affects Accuracy And Glucose Trends
Continuous glucose monitoring systems measure glucose in interstitial fluid rather than directly from blood. That fluid behaves differently depending on circulation, pressure, and tissue health.
Approved CGM placement sites are clinically validated to meet accuracy standards such as MARD performance thresholds (Heinemann et al., 2018). When CGM placement is correct and rotated properly, readings are typically more stable.
Poor CGM placement may lead to:
-
Compression lows during sleep
-
Signal interruptions
-
Early lifting of a libre patch
-
Skin irritation from stressed cgm adhesive
-
Micro-movement during exercise
Before questioning your sensor, review your CGM placement first.
If you are comparing device options and wear locations, see 5 best CGMs in 2025 for a broader overview.
Approved CGM Placement Sites For Adults And Children
Always follow your manufacturer’s guidance.
For most adults, approved CGM placement includes:
-
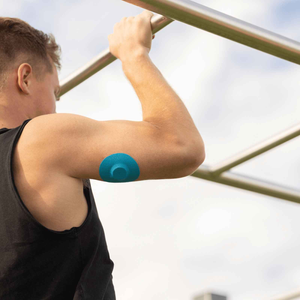
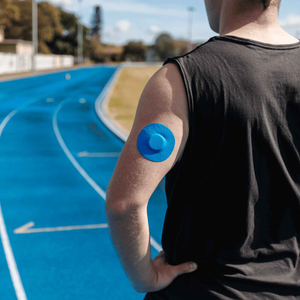
Back of upper arm
-
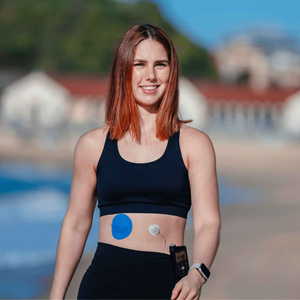
Abdomen
-
Upper thigh for certain systems
-
Upper buttock for children

Different systems may vary slightly. For clarity around Libre system differences, review Freestyle Libre 2 and 3 readers explained.
The best CGM placement balances approved accuracy with your sleep position and activity level.
CGM Placement Comparison: Arm Vs Abdomen Vs Thigh
|
Placement Site |
Accuracy Stability |
Compression Risk |
Adhesion Stress |
Best For |
|
Back of arm |
Strong clinical validation |
Moderate for side sleepers |
Medium |
Most adults |
|
Abdomen |
Stable during daytime |
Higher if stomach sleeper |
Low |
Desk-based users |
|
Upper thigh |
Stable in motion |
Low |
Higher friction from clothing |
Active users |
|
Upper buttock |
Protected area |
Low |
Low |
Children |
Use this comparison to evaluate CGM placement based on lifestyle rather than habit.
How Exercise And Sweat Impact CGM Placement Stability
Exercise increases sweat, blood flow, and muscle contraction. These factors stress both the sensor filament and the surrounding cgm adhesive.
If your CGM placement is correct but lifting occurs early, reinforcement may help more than relocation.
Active users often benefit from:
-
Breathable cgm adhesive patches
-
Flexible dexcom overpatch support
-
Sweat-resistant libre patch reinforcement
-
Targeted cgm stickers during training
For movement-specific wear tips, read why athletes keep spare CGM patches.
If your CGM placement works but heat or workouts cause lifting, explore durable options in the CGM patch collection.
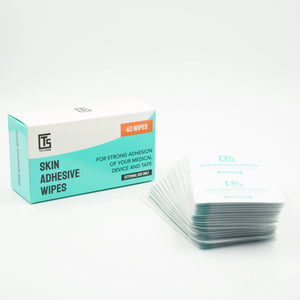
For added grip before insertion, Type Strong skin adhesive wipes can strengthen cgm adhesive hold while remaining breathable.
Supporting CGM placement early reduces unnecessary sensor changes.
How To Prevent Compression Lows With Better CGM Placement
Compression lows happen when body weight presses on the sensor during sleep, temporarily affecting local fluid flow.
To reduce compression-related instability:
-
Avoid CGM placement directly under your dominant sleeping side
-
Rotate placement every sensor cycle
-
Avoid tight clothing over the sensor

If overnight readings are inconsistent, review sleep comfort tips for CGM users.
Often, adjusting CGM placement resolves repeated false lows more effectively than recalibration.
Common CGM Placement Mistakes That Cause Inaccurate Readings
Understanding common errors improves long-term wear success.
Placing The Sensor Over Scar Tissue
Scar tissue may alter interstitial fluid dynamics. Avoid inserting in the exact same area repeatedly.
Reusing The Same CGM Placement Site
Repeated CGM placement in one location increases inflammation and weakens adhesion strength.
Choosing High Friction Areas
Waistbands and tight clothing areas stress cgm adhesive patches and increase lifting risk.
Over Layering Adhesive
Stacking multiple rigid layers can irritate skin and reduce airflow. Breathable reinforcement works better than excessive layering.
If irritation occurs, review how to identify a CGM patch reaction.
CGM Placement Rotation Strategy For Long Term Skin Health
A structured rotation pattern supports skin recovery and consistent performance.
Example rotation:
-
Left arm
-
Right arm
-
Abdomen left
-
Abdomen right
-
Upper thigh
Allow full skin recovery between placements. Healthy skin improves both comfort and cgm adhesive durability.
How To Stop Your CGM From Falling Off After Placement
Early detachment is often an adhesion issue rather than a placement issue.
To improve stability:
-
Clean and dry skin thoroughly
-
Avoid lotions before insertion
-
Apply breathable dexcom overpatch or reinforced libre patch support
-
Use skin adhesive wipes if sweat affects adhesion
Stable CGM placement combined with reliable adhesion reduces mid-cycle stress.
Support Your Next CGM Placement With Stable, Breathable Adhesion
Even the best CGM placement can struggle if adhesion does not match your lifestyle.
Heat, sweat, sleep pressure, and movement all affect how securely your sensor stays in place. Reinforcing your CGM placement with breathable support helps reduce lifting and unnecessary replacements.
Thoughtful CGM placement paired with the right adhesion support makes monitoring more predictable and sustainable.
References
Heinemann, L., Freckmann, G., Ehrmann, D. and Faber-Heinemann, G. (2018) ‘Real-time continuous glucose monitoring in adults’, Journal of Diabetes Science and Technology, 12(3), pp. 603–612. Available at: https://journals.sagepub.com/doi/10.1177/1932296818765658


