

Five tips & tricks to protect your Dexcom G7 / ONE+ sensor (+ bonus tip)

You're three days into a fresh sensor when your sleeve catches the edge getting out of the car, and it's gone. Not lifting, not peeling. Gone, along with the rest of that sensor's data. If that's happened to you on a Dexcom G7 or Dexcom ONE+, you're not doing something wrong. It's the most common way a G7 sensor is actually lost.

Why a Dexcom G7 comes loose, and the fastest fix
A Dexcom G7 or Dexcom ONE+ usually comes off one of two ways: a slow peel from sweat or moisture working under the edge, or a sudden knock that pulls the whole sensor free in one go. The slow peel is what most advice online addresses. The sudden knock is the one that actually costs people a sensor, and it's the one this guide is built around. The fastest fix for both is the same: apply a device-matched overpatch on day one, before there's any sign of trouble, rather than reaching for one after the sensor has already started to lift.
What actually goes wrong (a filament, not peeling corners)
Underneath the adhesive, a Dexcom G7 or Dexcom ONE+ sensor holds a tiny filament sitting just under your skin, reading glucose from the fluid there. That filament only works while the sensor housing stays exactly where it was placed. A little peeling at the corner is annoying but usually survivable. A doorframe catch, a seatbelt snag, or a shirt sleeve pulling the whole housing free is a full detachment, and once that filament moves, the sensor is done. Every tip below helps prevent both, but the overpatch in Tip 3 is the one that matters most for the second scenario.
Tip 1: Prep the skin clean, dry and oil free
Before you apply a new Dexcom G7 or ONE+, wash the site with mild soap and water or an alcohol wipe, then let it dry completely. Any trace of lotion, sunscreen, or sweat sitting under the adhesive weakens the bond from the moment you apply it.
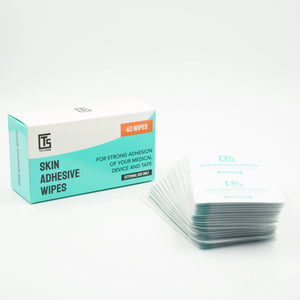
Skin adhesive wipes applied right before your sensor goes on create a thin, tacky base layer that gives both the sensor's own adhesive and any overpatch something better to grip. Our full guide on how to prep your skin for patches walks through the routine step by step.
Tip 2: Give the bond an hour before water
Once your Dexcom G7 or ONE+ is applied, avoid showering, swimming, or heavy sweating for about an hour. That window lets the adhesive cure and form a stable bond. Apply straight after a hot shower and you're working against warm, damp skin, the opposite of what the adhesive needs. The same clock runs on removal day: give your skin a few minutes to cool and fully dry before a new sensor goes on.
Tip 3: Put the overpatch on day one, not after trouble
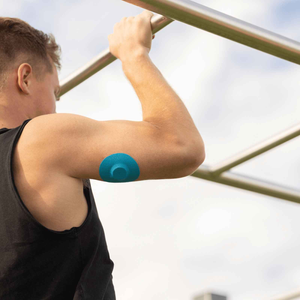
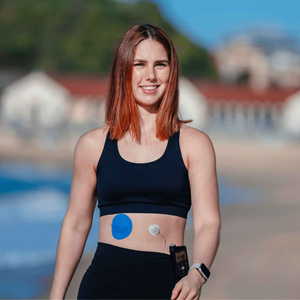
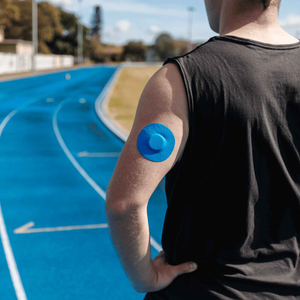
This is the tip that changes outcomes the most. Most people reach for an overpatch only once they notice lifting, which means the sensor has already been vulnerable to a knock for days. Apply a device-matched overpatch the same day you apply the sensor, before anything has gone wrong, and you're protected against both failure modes from the start.
If you do spot early lifting on an unprotected sensor, resist the urge to press it back down with a finger, since that introduces skin oils right where you need adhesion. Trim away the loose edge and reseal the border with a tape roll or overpatch instead. Our guide to Dexcom G7 overpatches, what they are and why you might need one covers this in more depth.
Tip 4: Use a patch cut for the G7 and ONE+
A generic patch or a piece of medical tape can leave the sensor's edges exposed, exactly where sweat and water get underneath. Dexcom G7 / ONE+ patches are cut to match the sensor's actual shape, so the edge is sealed rather than approximated, which matters more during exercise than most people expect. See how overpatches improve comfort during workouts and why regular patches don't always work for Dexcom G7 users for more on why fit matters here.
Tip 5: Keep lotions, oils and sunscreen off the site
Body lotion, oil-based creams, and sunscreen all reduce how well any adhesive grips, including a fresh Dexcom G7 or ONE+ and any overpatch on top of it. If you moisturise regularly, apply it after removing your old sensor rather than before your new one goes on, and keep the application site itself product-free. See our guide to post-adhesive skin care after CGM removal for looking after the site between wear cycles.

Bonus tips: doorways, seatbelts, towels and placement
A handful of small habits catch the sudden knock that skin prep alone can't prevent.
-
Ease through doorways and tight spaces. A quick turn is a common way to catch a corner.
-
Mind seatbelts and waistbands. Getting in and out of a car is a frequent snag moment.
-
Pat, don't rub, after water. Rubbing with a towel can drag at the edge.
-
Consider the back of the upper arm for contact sports. It's a comparatively stable spot.
-
Leave it alone once it's on. Fidgeting introduces the oils and pressure that loosen adhesive.
What to do when a sensor is knocked loose
If your Dexcom G7 or ONE+ comes off before its session ends, don't try to reapply the same sensor. Once the filament has moved, readings are no longer reliable even if the housing looks intact. Contact Dexcom support for a replacement if it failed well before the 10-day mark, since early failure outside of normal wear is generally covered. That's also the moment to add an overpatch from day one on your next sensor, rather than after a second one is lost the same way.
How to safely remove a Dexcom G7 sensor
When it's time for a planned change, go slowly. Lift one edge and peel back with steady, even pressure rather than pulling straight up. If the adhesive is stubborn, warm water, baby oil, or an adhesive removal wipe will loosen it without tugging at your skin. If you're prone to irritation at the site, our guide on how to tell if your CGM patch is causing a reaction covers what to watch for.
Two clocks: the 10-day sensor cycle and the 10+ day patch hold
Keep two numbers in mind. Dexcom rates the G7 and ONE+ sensor for a 10-day wear cycle plus a 12-hour grace period, about 10.5 days total. A well fitted, correctly applied Type Strong overpatch is designed to hold for 10 or more days alongside it, matching that cycle rather than falling short of it. And to be accurate rather than optimistic: our patches are water resistant, not waterproof. They hold up well through showers, sweat, and swimming, but no adhesive patch is built for prolonged submersion.
People also ask
Why does a Dexcom G7 keep falling off?
Most early losses come from a slow peel from sweat or moisture under the edge, or a sudden knock, such as a doorframe or seatbelt snag, that pulls the whole sensor free at once. The knock is more common than people expect and harder to prevent with skin prep alone.
How do you keep a Dexcom G7 on for the full wear cycle?
Clean, dry, oil-free skin before application, an hour's wait before water exposure, and a device-matched overpatch applied on day one work together. No single step covers both failure modes alone.
Should the overpatch go on day one?
Yes. Waiting until a sensor shows lifting means it's already been vulnerable to a knock for days. Applying an overpatch with the sensor protects against both failure modes from the start.
How long does a Type Strong patch hold?
A correctly applied Dexcom G7 / ONE+ patch is designed to hold for 10 or more days, matching the sensor's own wear cycle plus grace period.
Are Dexcom G7 patches waterproof?
No. They're water resistant, which covers showers, sweat, and swimming well. Waterproof implies indefinite submersion, which no overpatch, ours included, is built for.
What do you do when a sensor is knocked loose?
Don't reapply the same sensor, since the filament has likely moved. Contact Dexcom for a replacement if it failed well before the 10-day mark, and add an overpatch from day one on your next sensor.
Can I press a lifting edge back down?
Better not to. Pressing with a finger introduces skin oils exactly where you need adhesion. Trim the loose edge and reseal it with tape or an overpatch instead.
Does a Dexcom G7 overpatch affect accuracy? No. A properly fitted overpatch sits over the sensor housing, not the filament or reading window, so it doesn't interfere with how the sensor measures glucose.
Wrapping up
Most advice about keeping a Dexcom G7 or ONE+ on focuses on peeling corners, which is real but not the whole story. The failure that actually costs people a sensor mid cycle is a sudden knock or snag that pulls the whole thing free, and the best defence against that is an overpatch applied from day one, not after trouble starts. Pair that with clean skin prep, an hour's patience before water, and a patch cut for the G7 and ONE+ shape, and you're covering both ways a sensor can fail.
If you're ready to stop losing sensors early, our Dexcom G7 / ONE+ patches are built for exactly this. Browse the full CGM patch collection for every device we support, and if you're weighing devices generally, our best CGMs in 2026 roundup is a useful next read. Still on a Dexcom G6? Our separate guide to protecting a Dexcom G6 sensor covers that sensor's different shape and adhesive needs.
Keep your CGM secure to get accurate results. Shop CGM patches
References
-
Dexcom. "How long can I wear the Dexcom G7 sensor?" dexcom.com
-
Dexcom. "Dexcom G7 CGM Expiration and Grace Period." tandemdiabetes.com support documentation
-
Diabetes UK. "Sensor wear and skin protection for CGM users." diabetes.org.uk
-
National Library of Medicine. "Skin preparation and adhesive management for medical devices." pubmed.ncbi.nlm.nih.gov/37084529
-
American Diabetes Association. "Diabetes Technology: Standards of Care." diabetesjournals.org


